What do lineweights and linetypes do?
Lineweights and linetypes give a line drawing the ability to more clearly communicate information. They add depth and communicate what is being cut in a drawing, what's visible, and what's behind the cut plane.
In a clear drawing, the effect of the lineweights is felt, but the individual weights are not immediately seen. A good tip is to stay lighter rather than go heavier.

Drawing without lineweights

Drawing with lineweights
Outline, Edge, Crease
Lineweights are about visual hierarchy. Start by giving the heaviest (thickest) lineweight to the outline of the drawing - anywhere that the geometry meets the space of the page (including any holes).
Then, focus on edges of geometry that appear to overlap other geometry. Like the outline, this is view-dependent.
Last, look for any creases or folds in the geometry. Give these lines the lightest lineweight.


Outlines (red), Edges (green), Creases (blue)
Rule of Thumb
The exact line thickness of appropriately delineated drawing will vary depending on the density of lines in the drawing, intended format and size of display, printer and paper capabilities, and personal preference. The following is a rule of thumb starting point for the image above printed with an above average inkjet printer on a letter size sheet of standard matte photopaper.
The exact line thickness of appropriately delineated drawing will vary depending on the density of lines in the drawing, intended format and size of display, printer and paper capabilities, and personal preference. The following is a rule of thumb starting point for the image above printed with an above average inkjet printer on a letter size sheet of standard matte photopaper.

Note: In a dash line, always have a smaller gap than dash.
How To
1
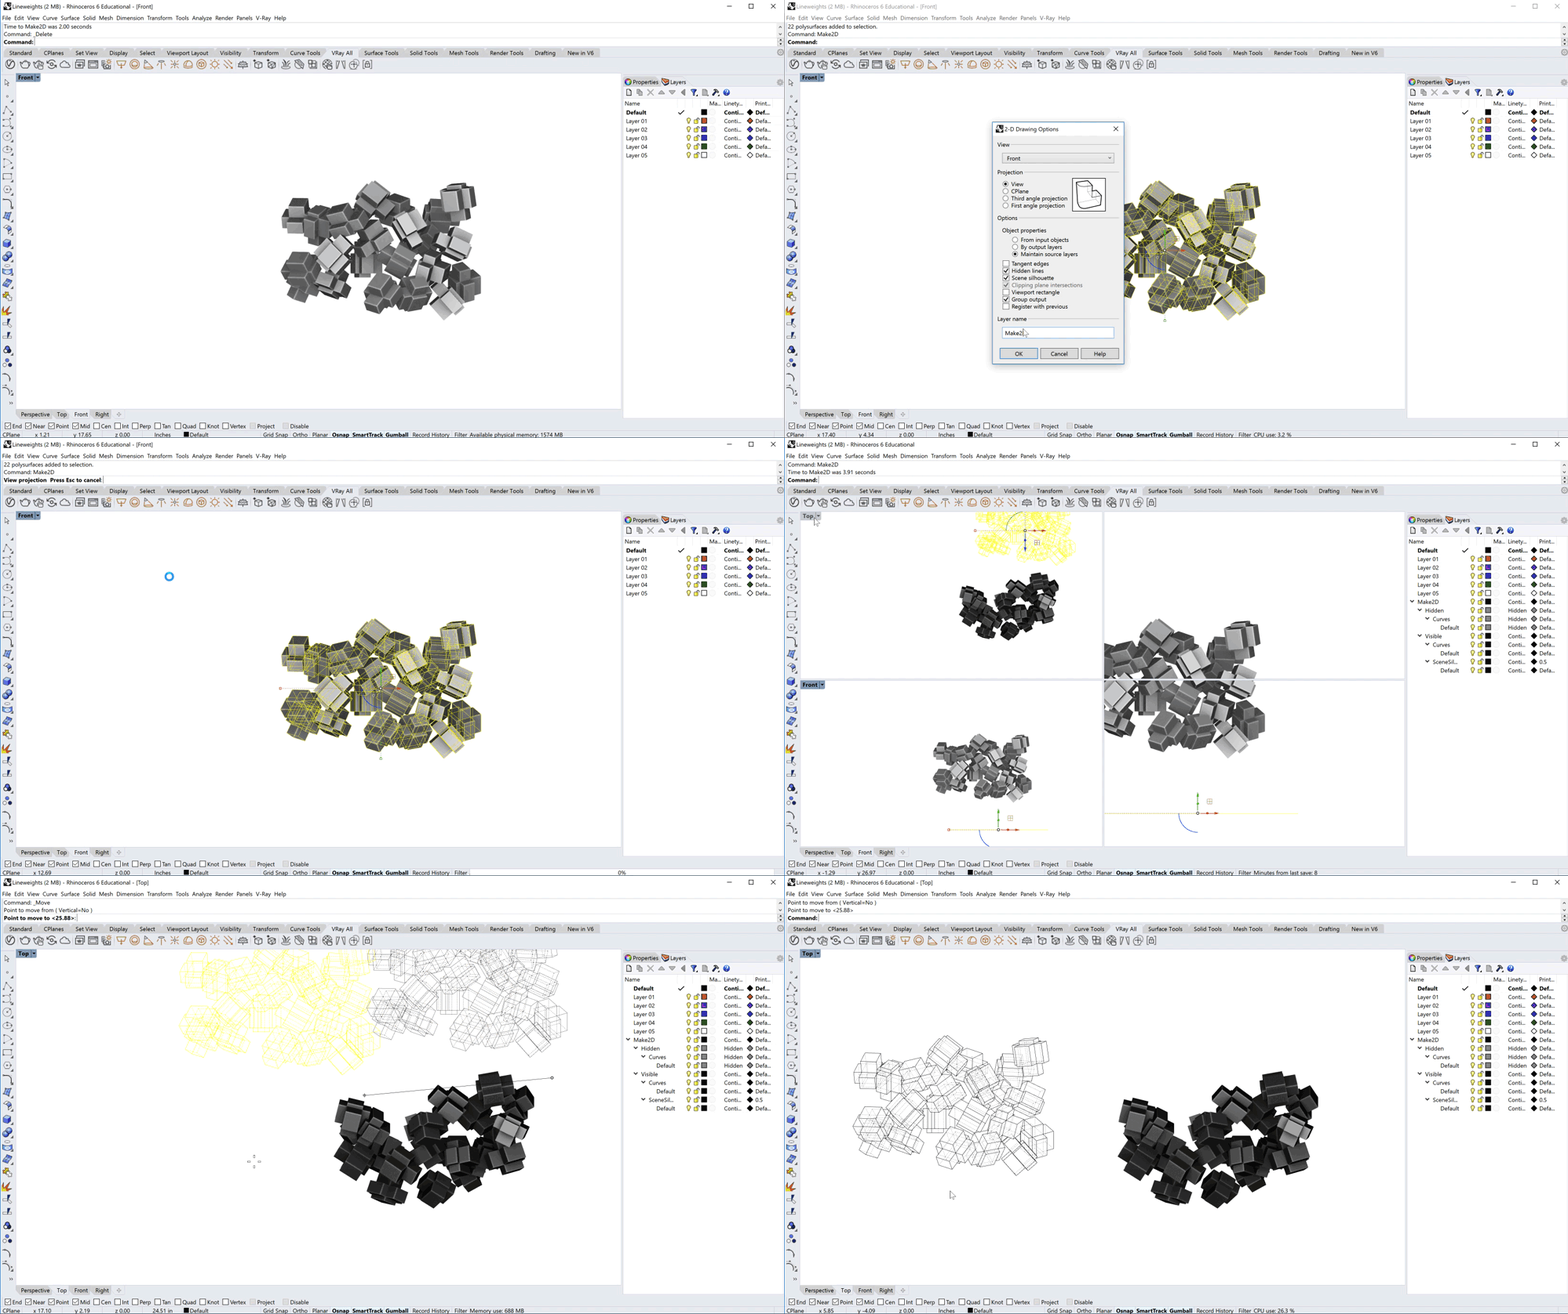
Select the objects to draw in your orthographic view of choice. Enter Make2d into the Command Line. Uncheck Group Output, and check Hidden and Silhouette. You'll find the drawing in your top view, near the 0,0 origin. *NOTE for 1GA 2023 Visual Studies** You will make a top, right, and front view drawing. You’ll need to repeat the following steps for each view. Note that you Make2d is dependent on the view you’ve selected, but it will always place the linework in the Top view.
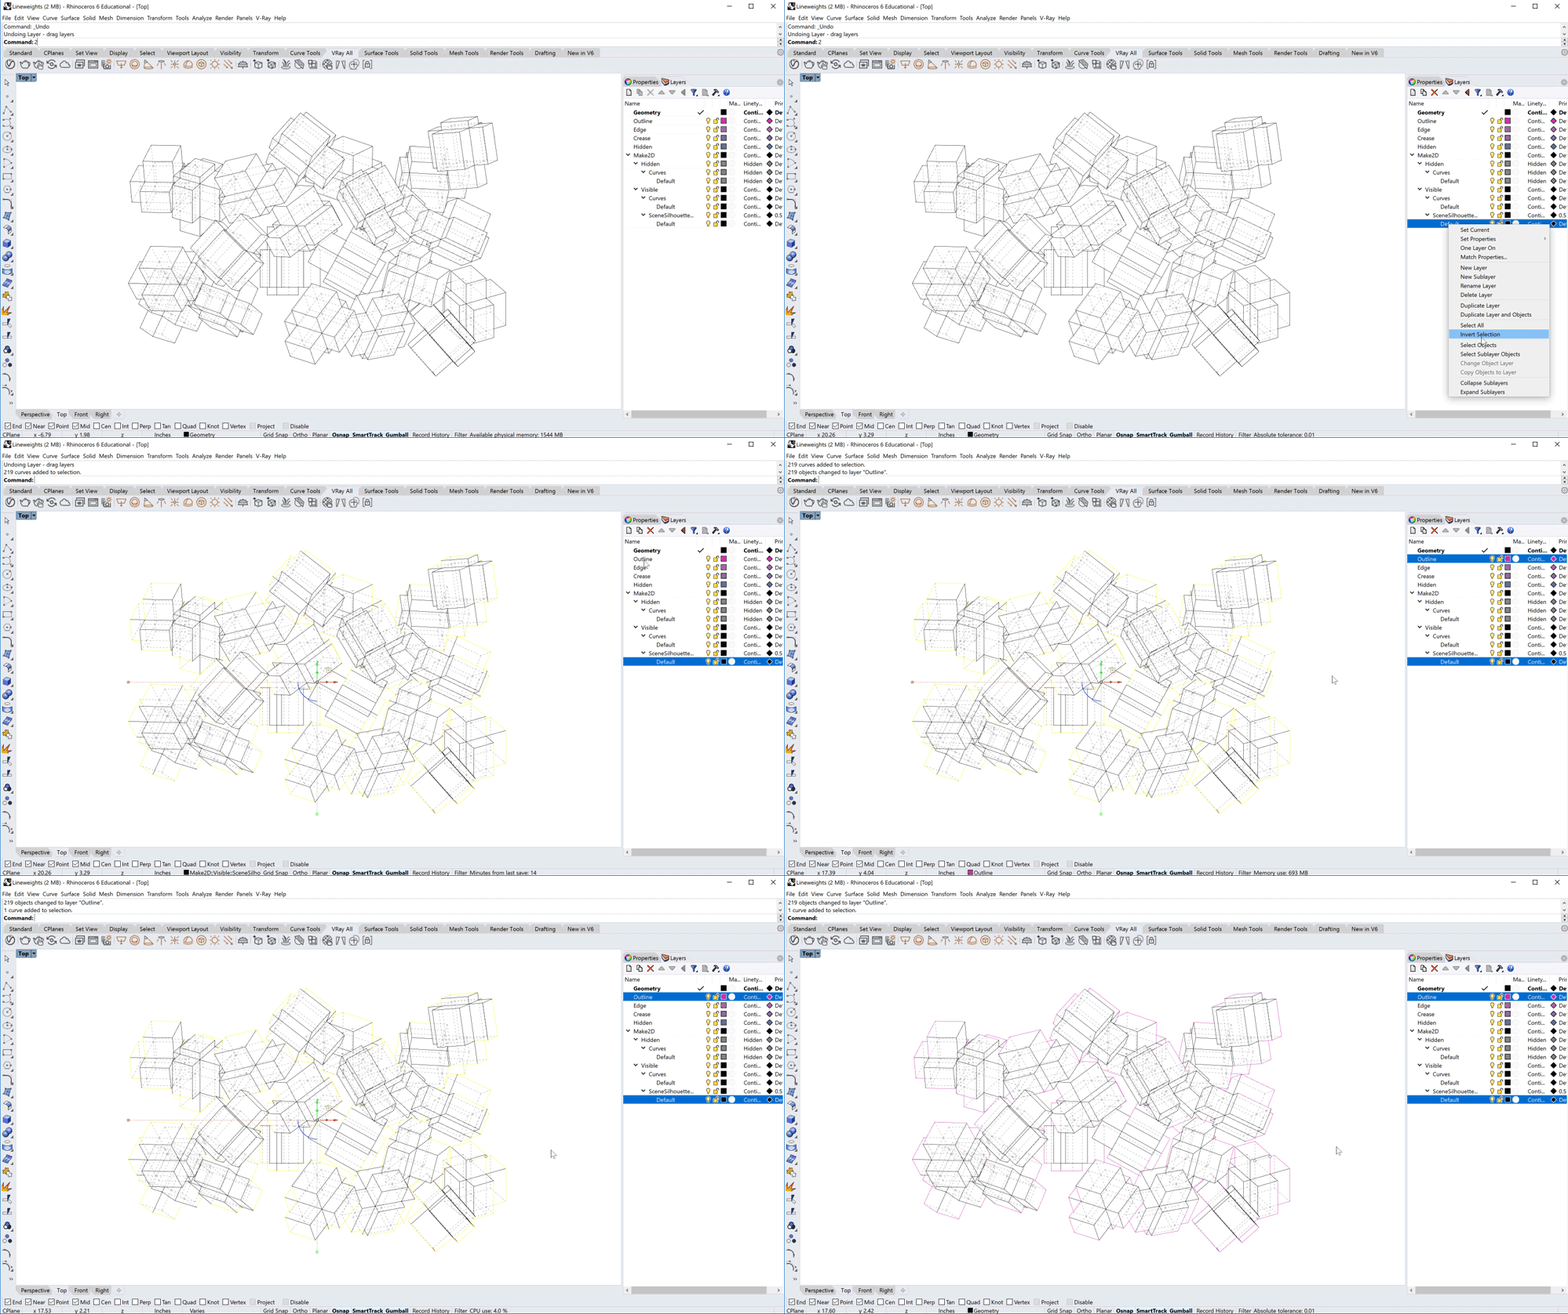
Create new layers: Outline, Edge, Crease, Hidden. Right click on the appropriate Make2D layer and select Select Objects, then right click on the layer to move those lines to, and select Change Object Layer.
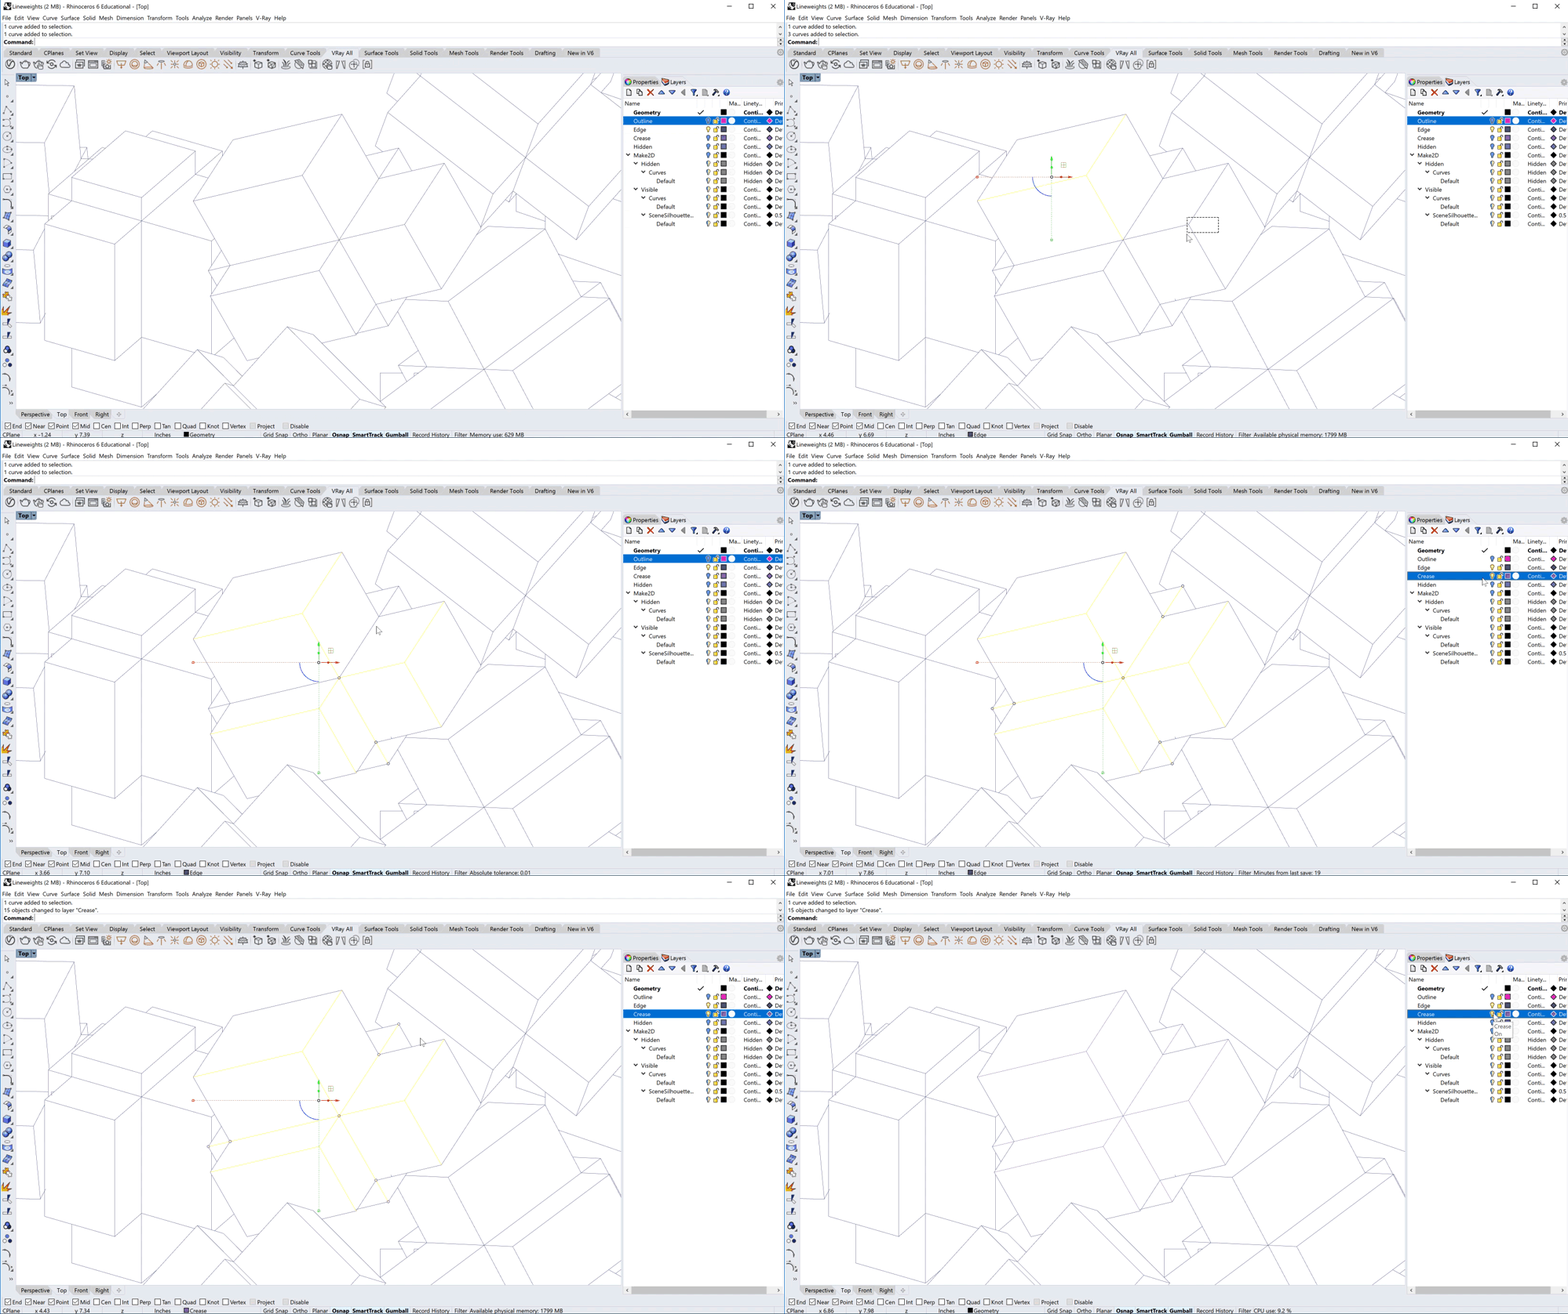
Make2d will place edges and creases onto the same layer. You'll have to selectively separate these yourself. Remember, edges are where a figure's geometry ends and appears to be in front of something else, whereas a crease is where there is a geometric fold. Sometimes, a crease will also be an edge. Edges have hierarchy over creases, so place the line onto the Edges layer.3. Make2d will place edges and creases onto the same layer. You'll have to selectively separate these yourself. Remember, edges are where a figure's geometry ends and appears to be in front of something else, whereas a crease is where there is a geometric fold. Sometimes, a crease will also be an edge. Edges have hierarchy over creases, so place the line onto the Edges layer.
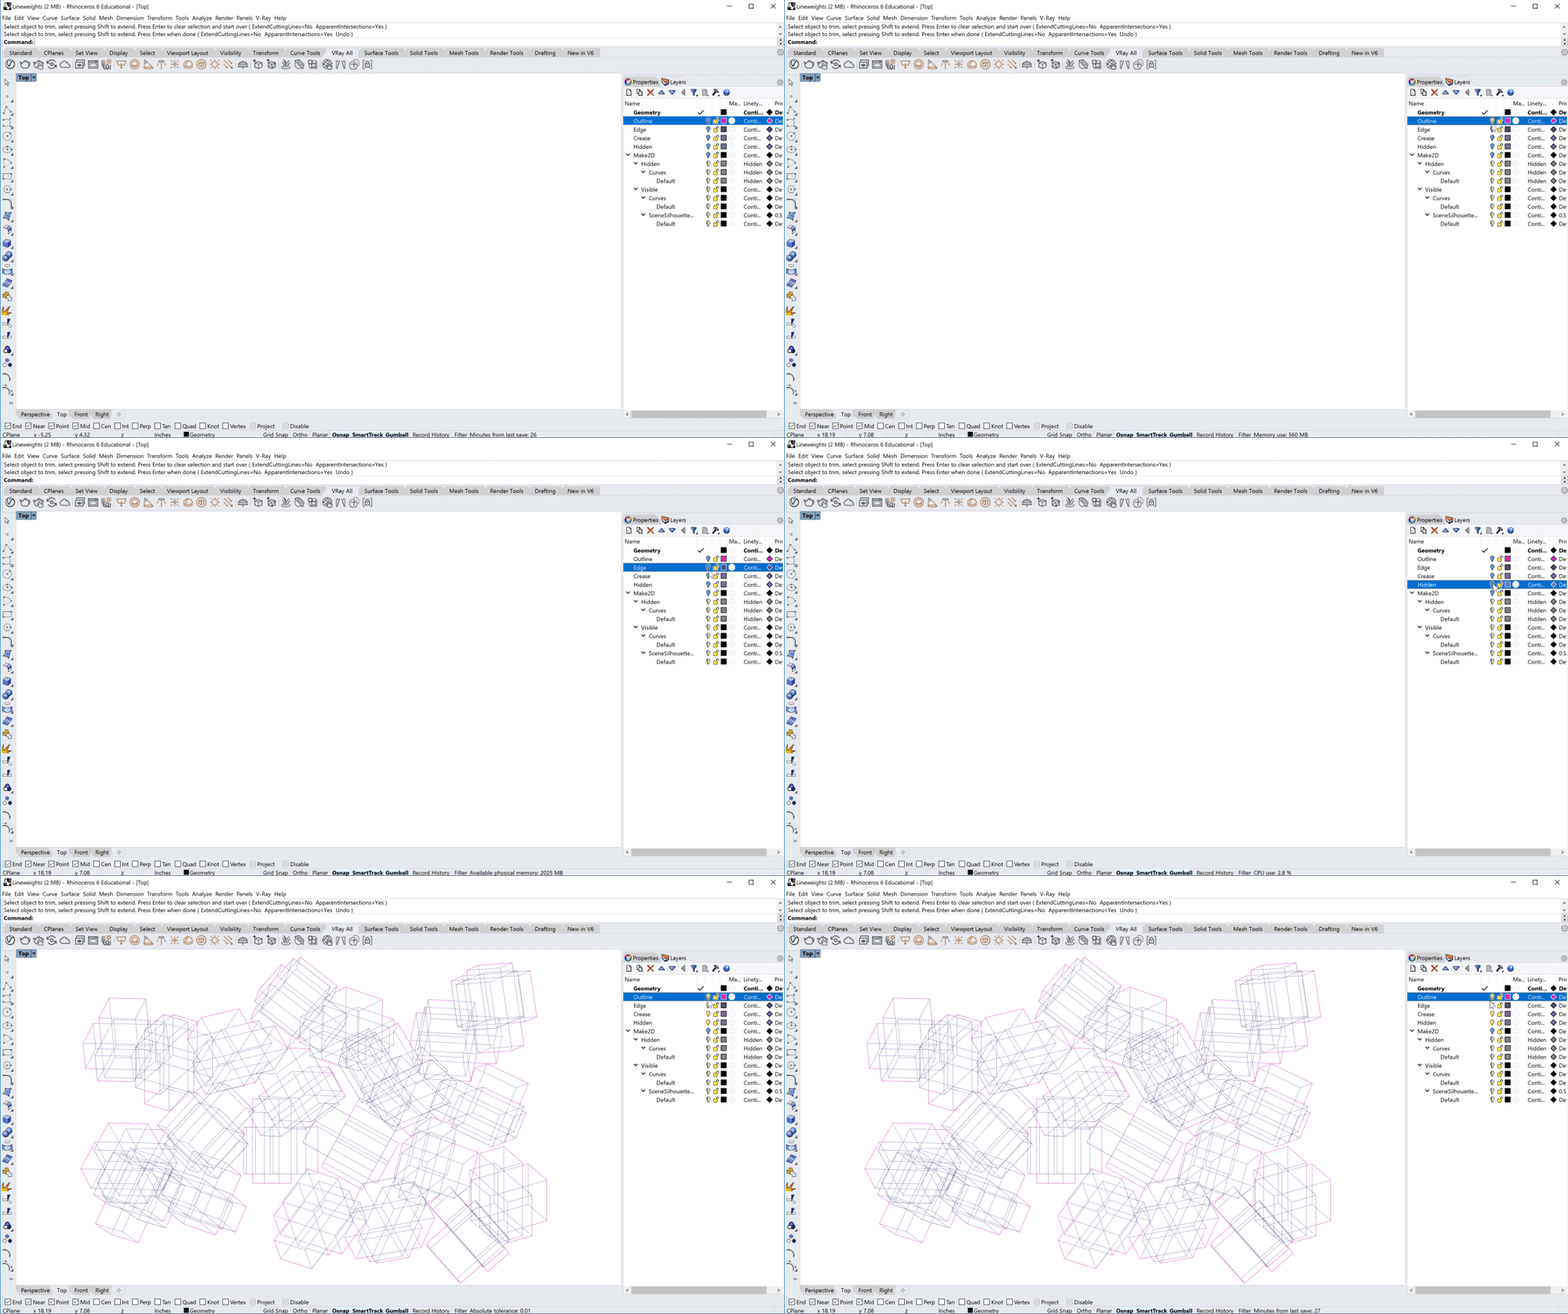
Repeat until you have your curves assigned to the appropriate layers. To get the curves for the Outline layer, select the geometry and type MeshOutline. This will create 2D linework in your view - you need to place it with your other lines.
5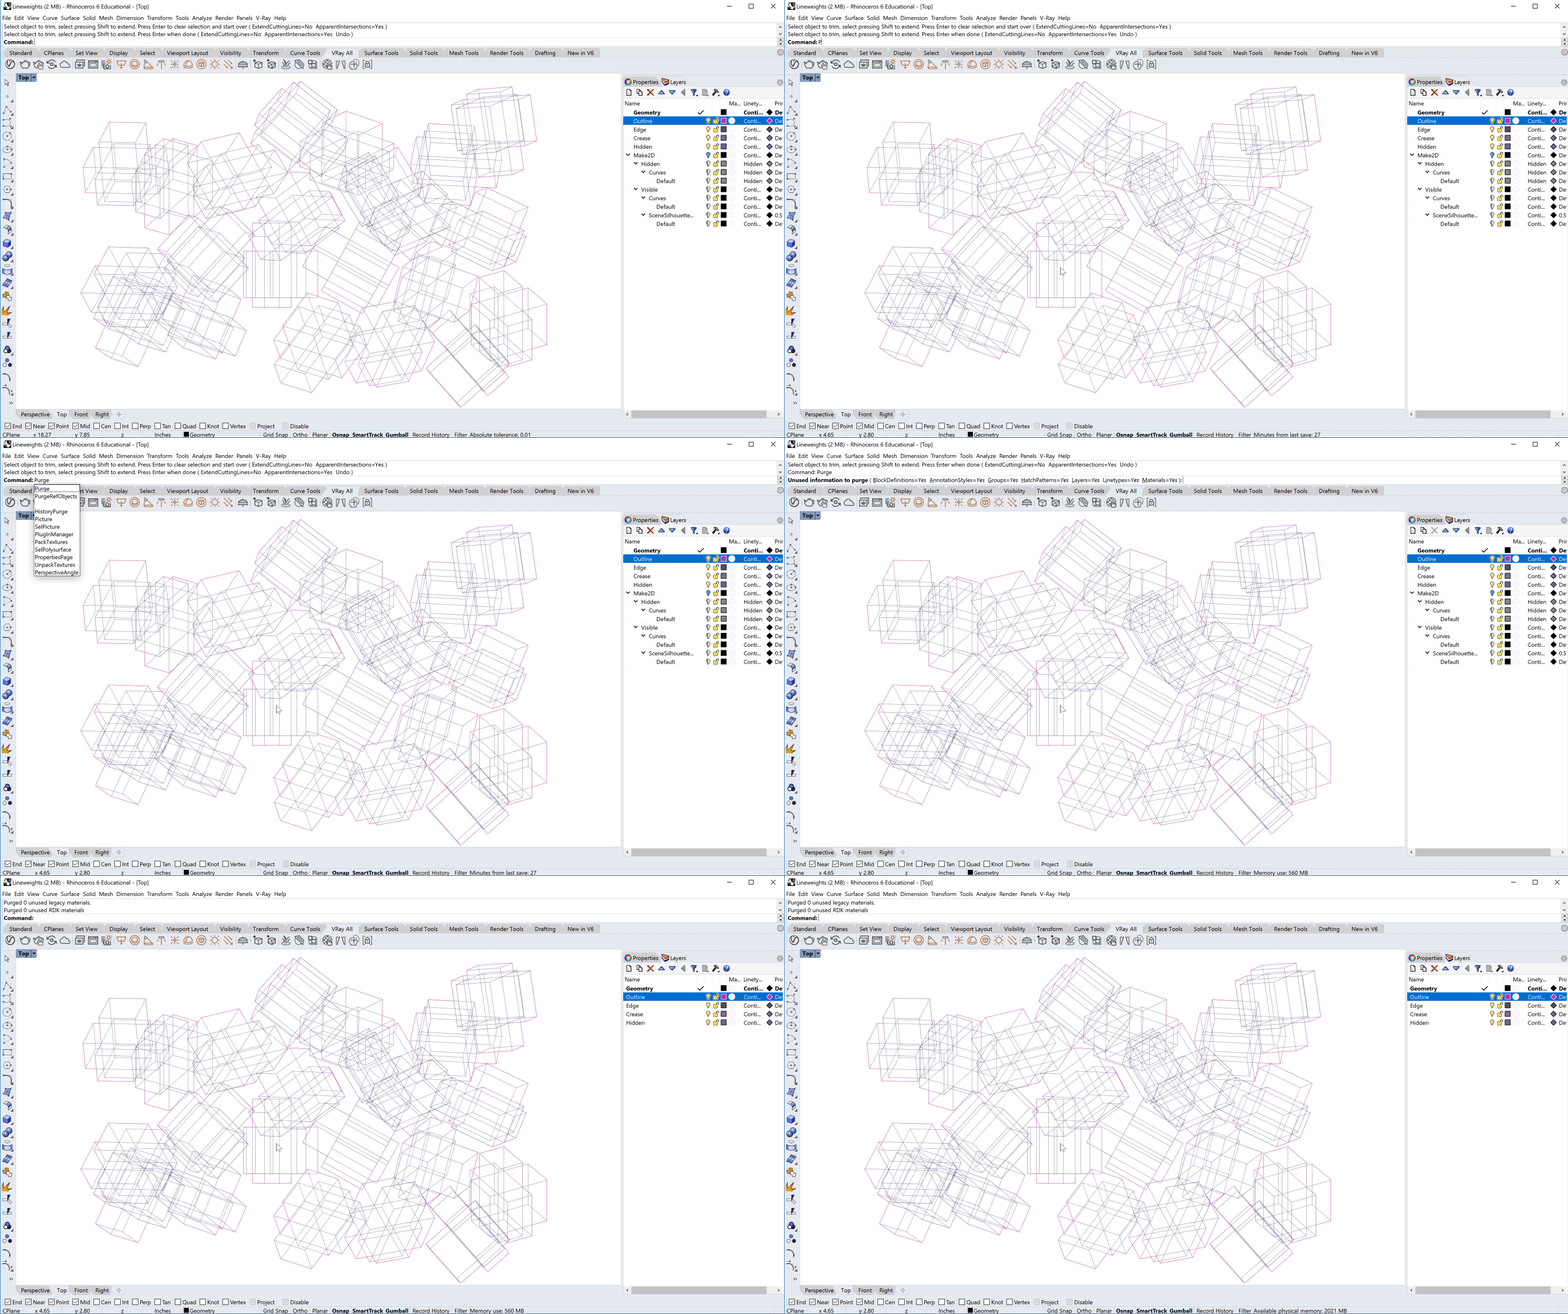
You can use Purge to delete empty layers.
6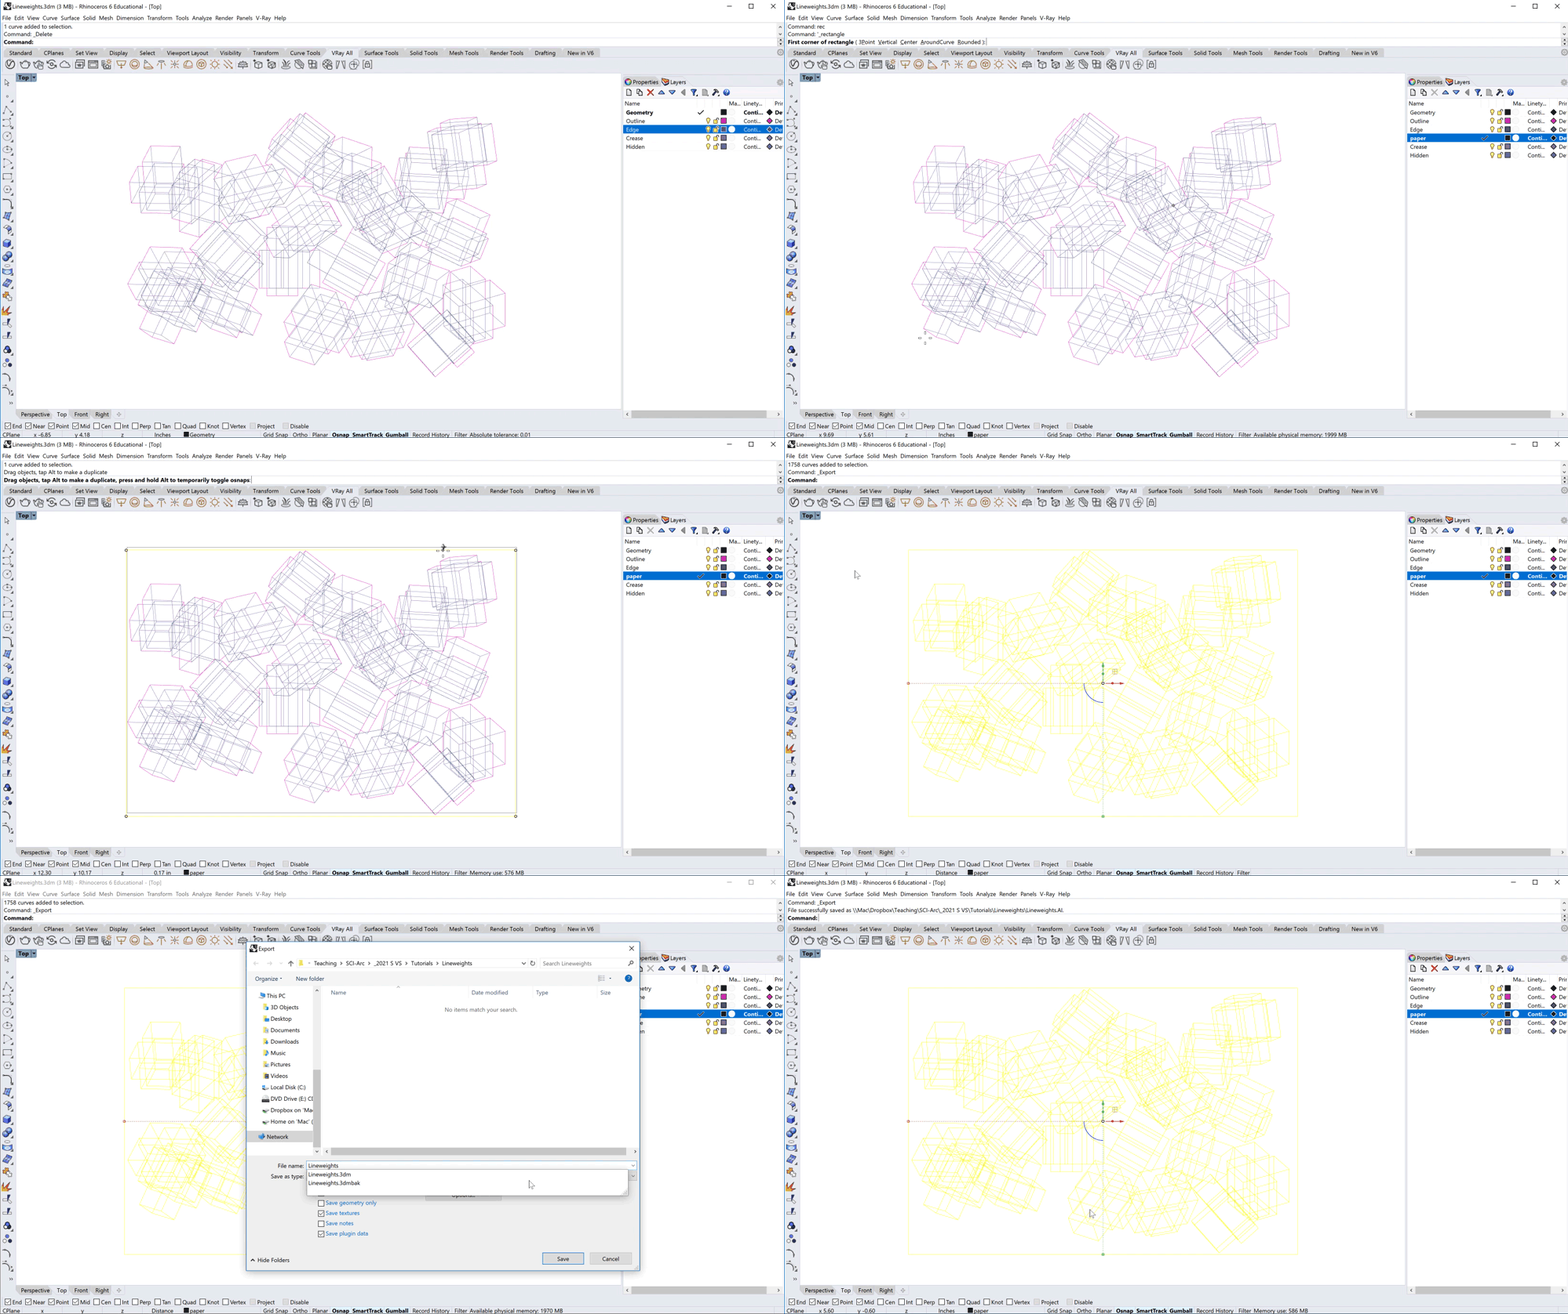
Make a Paper layer and draw the 13" x 19" paper. Select your drawing, including the paper rectangle, and go to File > Export Selected. In Save as Type, select Adobe Illustrator. Then, in the Export Options, select Preserve Model Scale and make sure it says 1 inch = 1 inch. If you do not see inches on both sides of the equal signs, check your units. **NOTE for 1GA 2023 Visual Studies** To make the Tony Smith drawing, you’ll need to export to 1:8 scale. The settings should read “1 inch = 8 inch”
7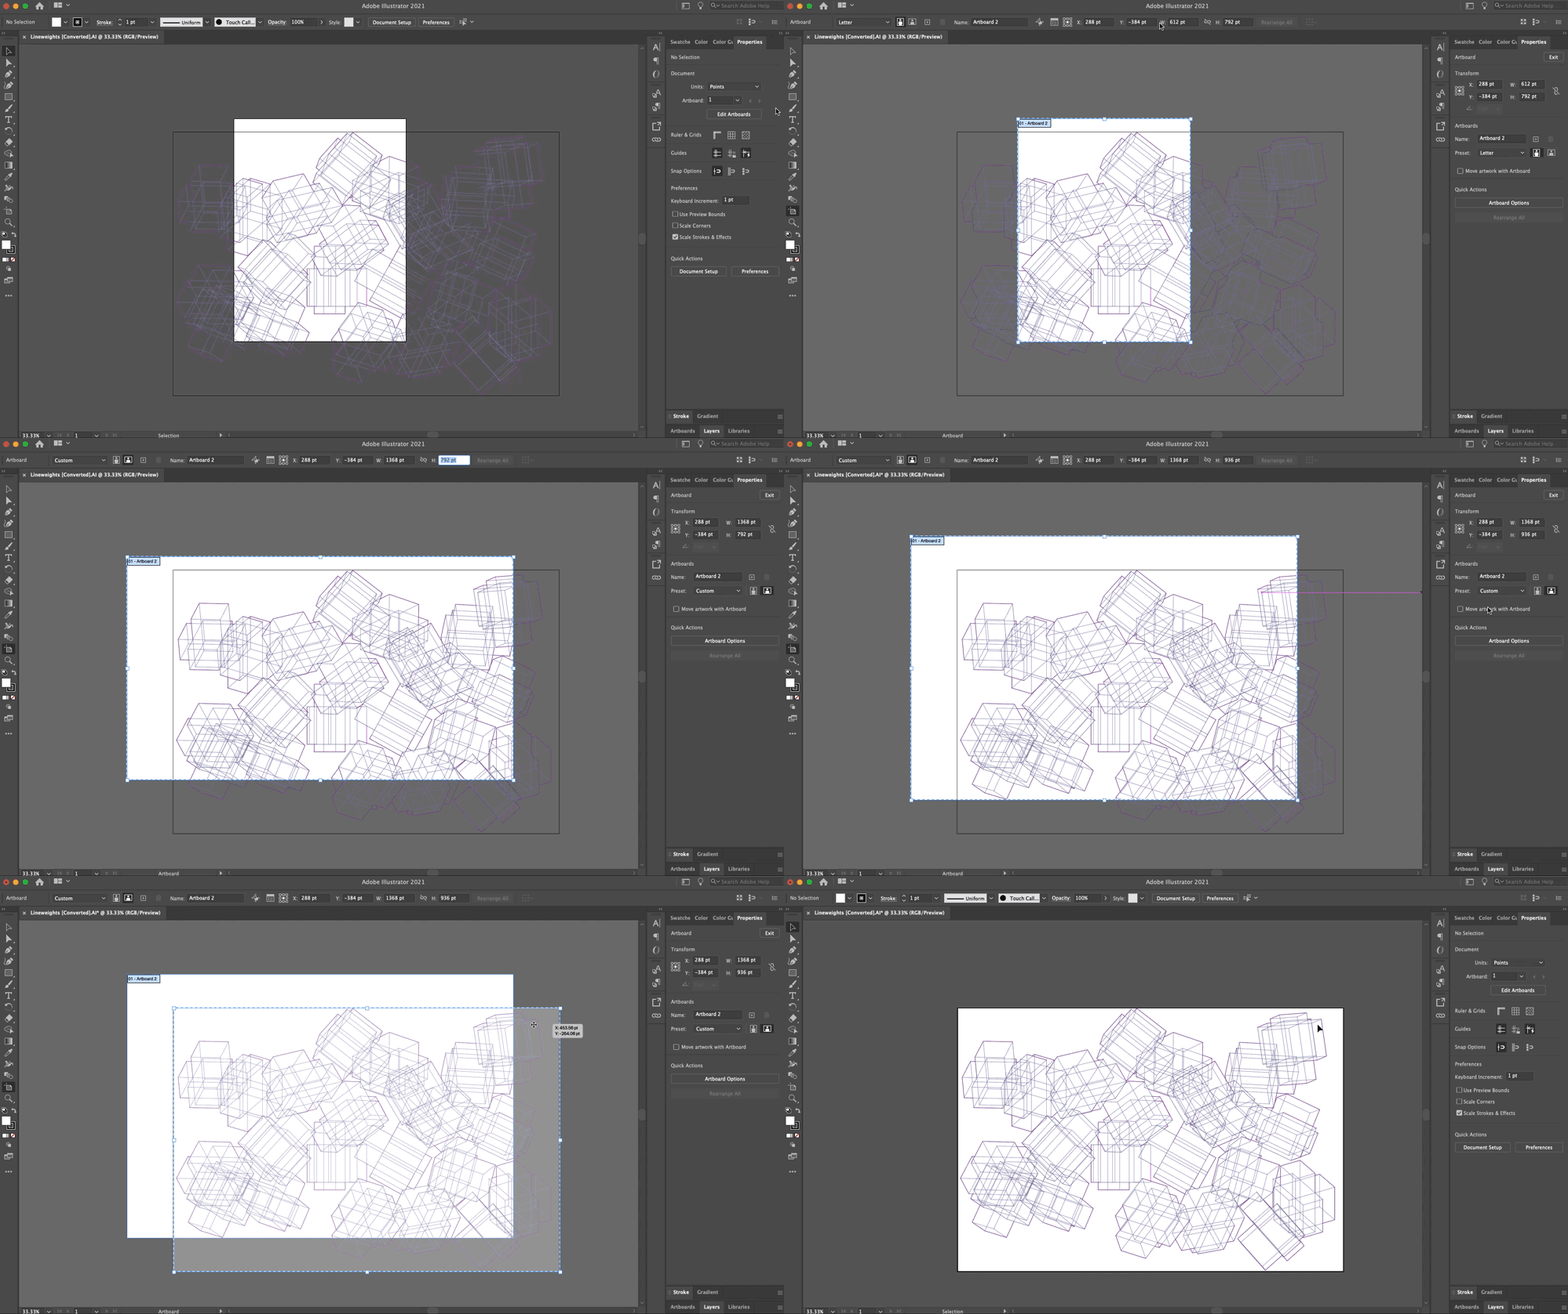
Open in Illustrator. Change the artboard to your paper size - make sure that Move Artwork with Artboard is UNCHECKED in the Properties panel. If you do not see your artwork, hold down the space bar and move around until you see it. If you still don’t see it, return to Rhino and move the linework to 0,0 and double check your units and export scale settings. Center your drawing, if it extends past the edge of the page that’s okay.
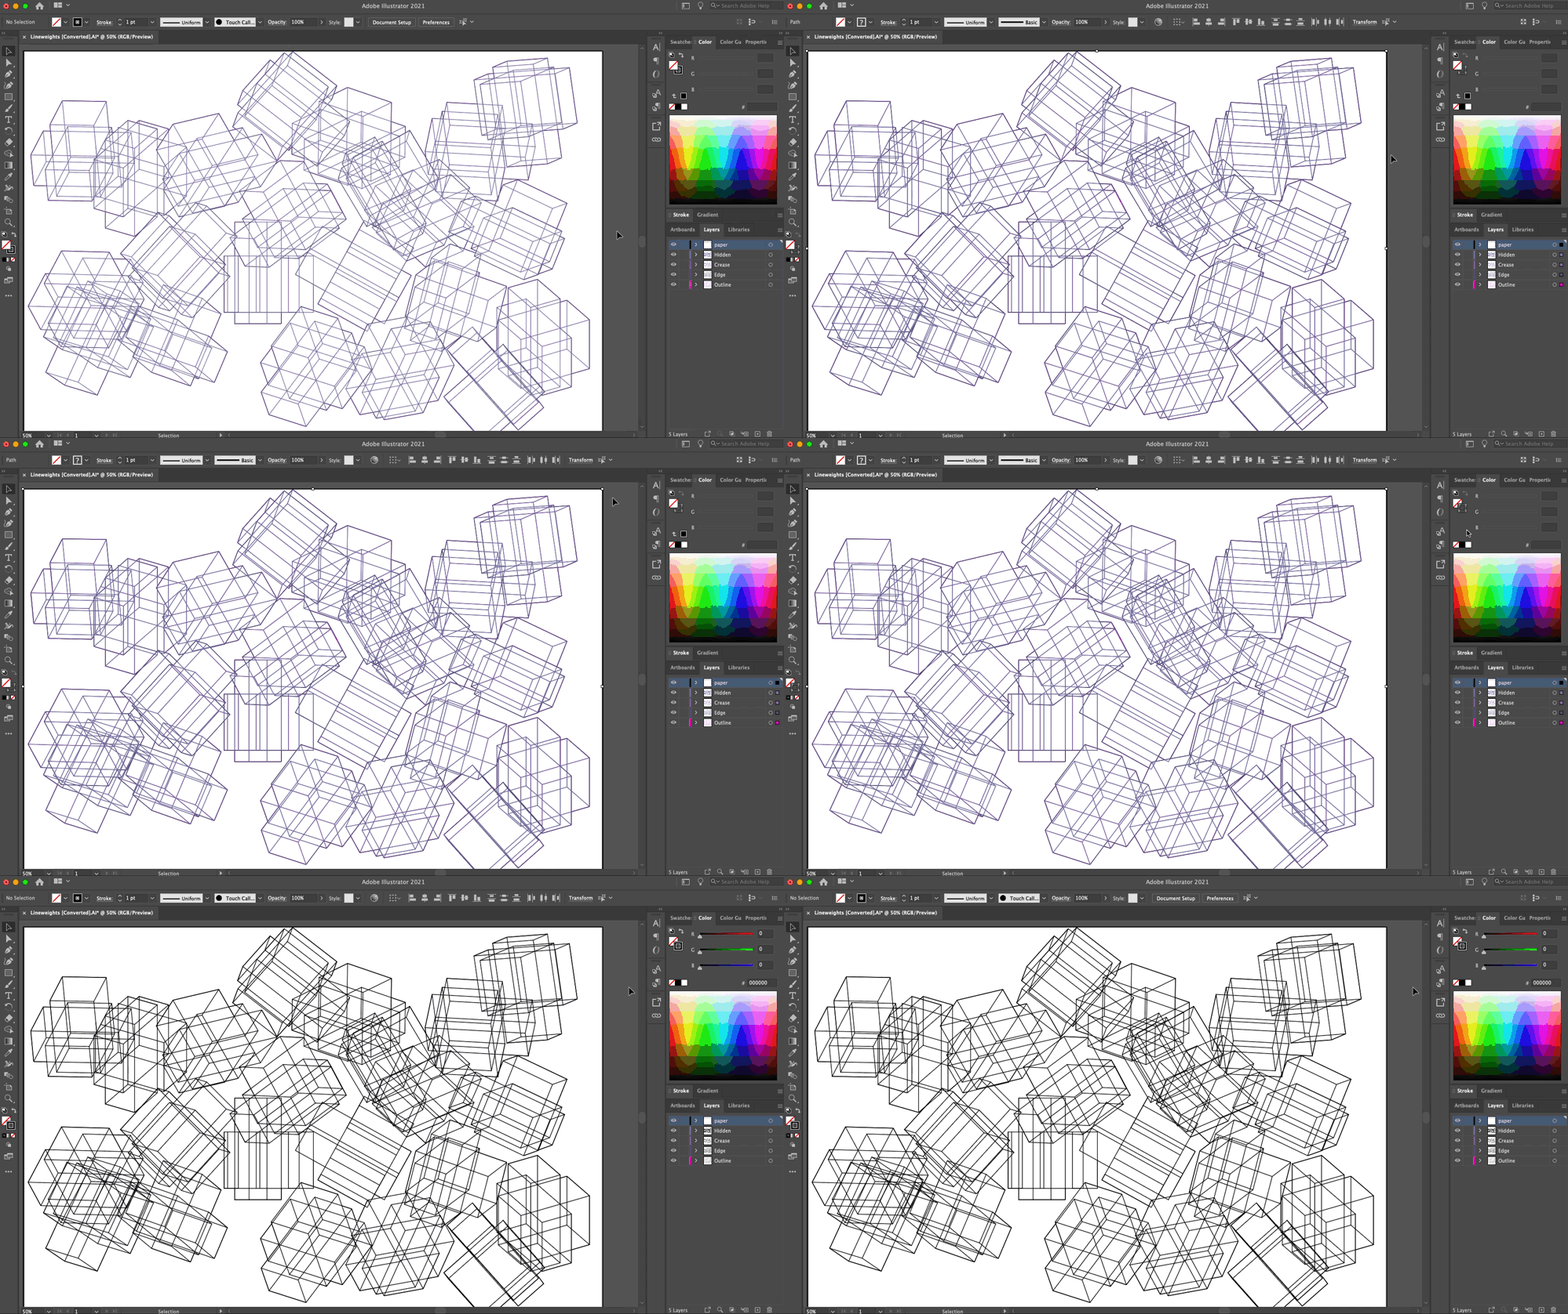
Select all lines, change the stroke to black.
9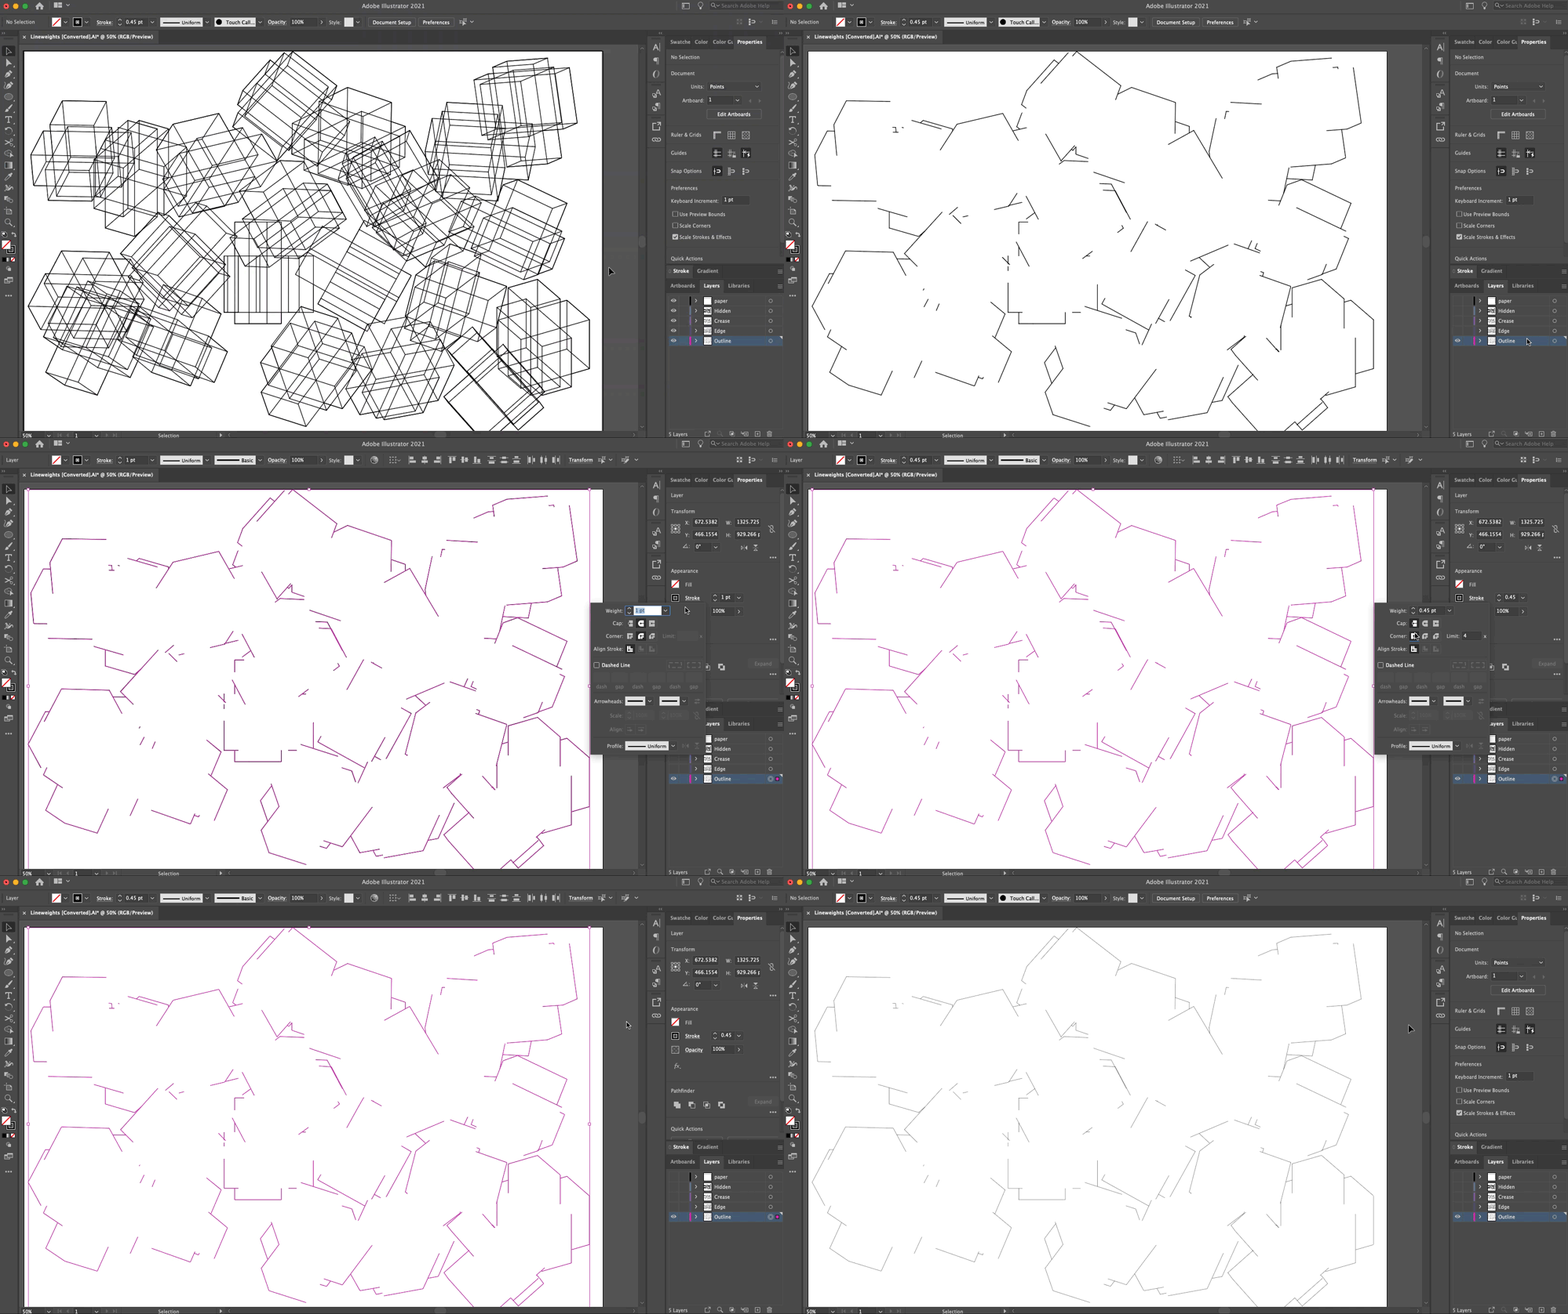
Change the lineweight by layer. Click to the right of the appropriate layer to select all the objects on that layer. Select Stroke in the Properties panel. Set the lineweight and change the end caps to square.
10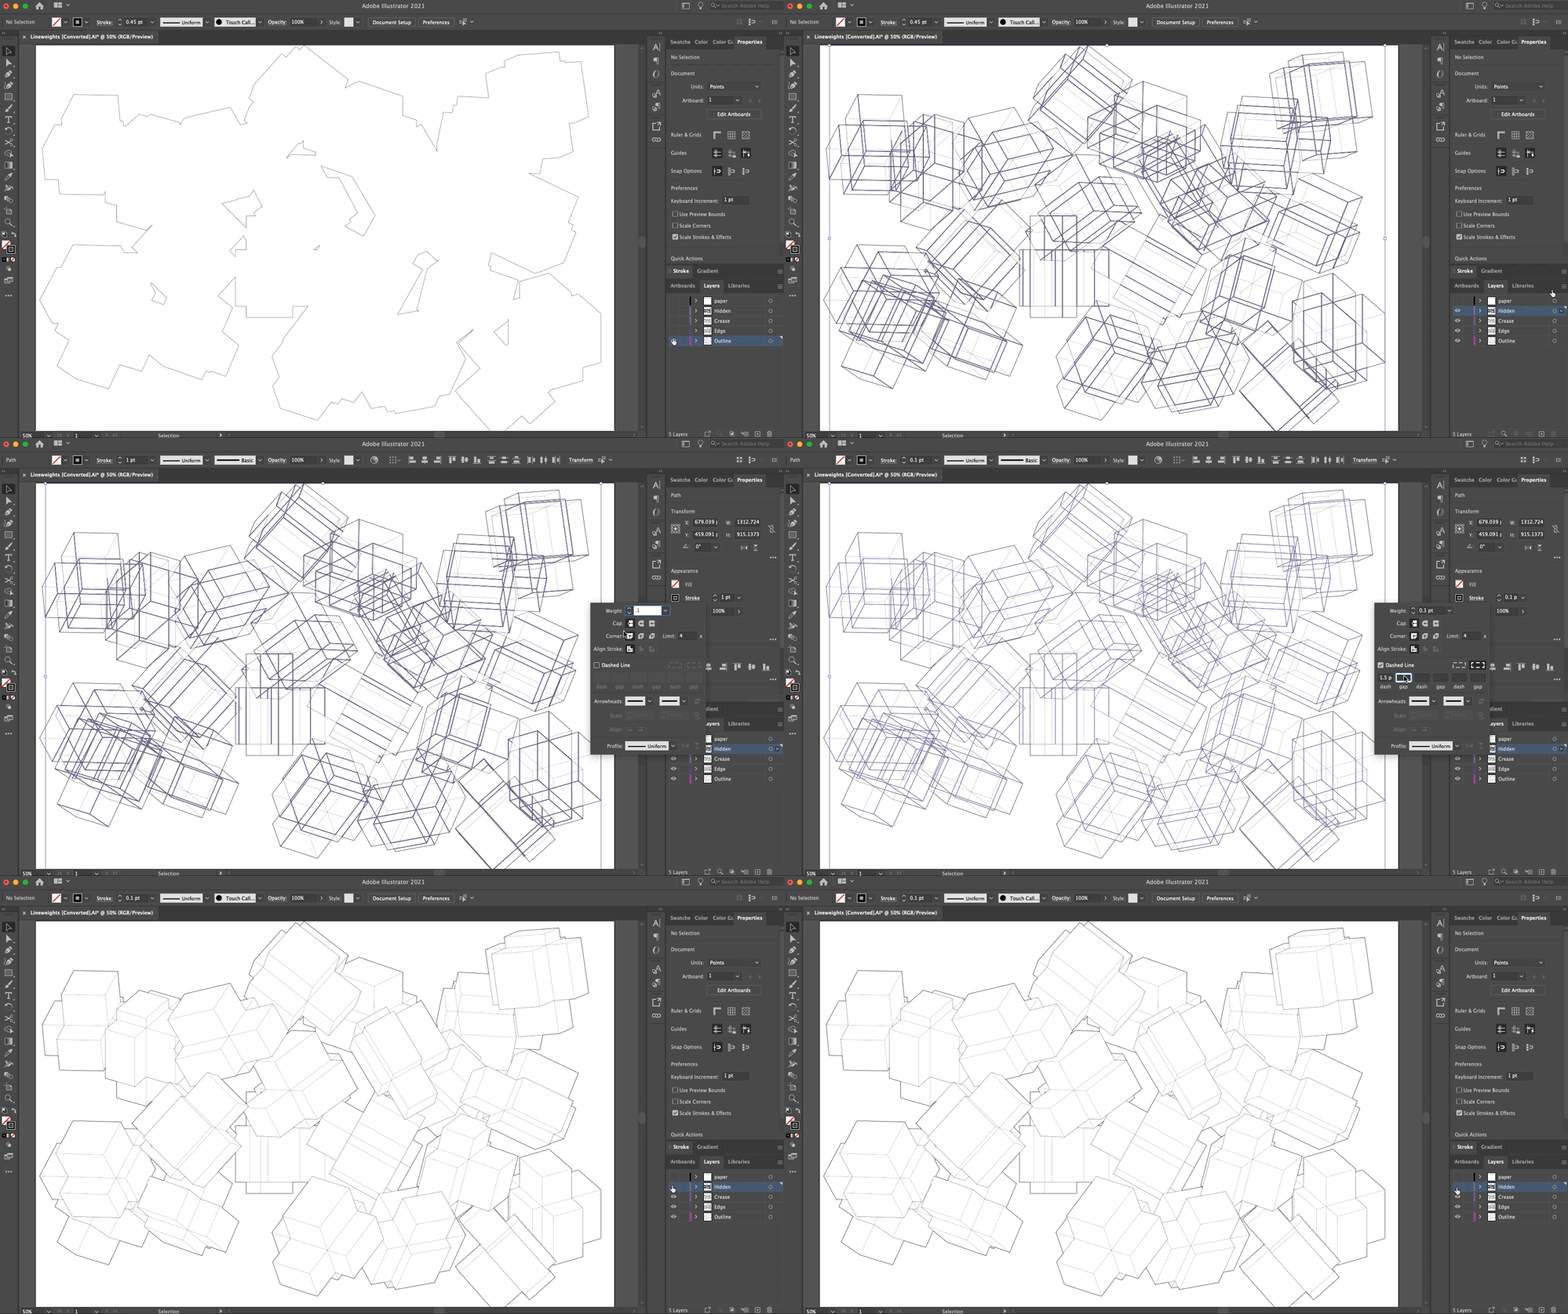
Repeat for each layer. For the hidden lines, add a dash linetype. Hidden lines are optional, they can either clarify or clutter the drawing.
11


When finished, export your drawing. If you will print your drawing out, go to File > Save As and under format, select Adobe PDF. In the pop-up menu, hit Save.